Python Programming
This page is meant to give an overview of the use of Python Programming in the first balloon project. This page is not meant to be a comprehensive introduction to Python Programming.
If you have read the sections of my website on receiving, formatting, and sending GPS coordinates you will be familiar with the KVL format. This format is just a popular CSV based format that allows coordinates to be viewed in programs like Google Maps or Google Earth. The purpose of this Python script then is to read the serial data from the radio modem, check the validity of this data, and then store that data.
DISCLAIMER: I am not especially proud of this program. Primarily how I ensure the GPS message is valid once it is received by the computer. I use a lot of "tests" to make sure there is no error in the data. The tests I use though were just based on problems I was running into, so the problems the errors that this code can handle are limited to the ones I have experienced already. If I were to rewrite this code rather than implement these preventative measures I would just use a cyclic redundancy check to ensure the data was received correctly (this is what I am using in the third balloon).
Getting Started
Note, before starting let me say that I am using python on a Macbook. So all of these tutorials will be aimed at OSX users, but I am sure the vast majority of the information presented here will be relevant on different platforms.
To start we need to download the latest version of Python. The download can be found here: PYTHON DOWNLOAD. Follow the instructions on the website to install the latest version of Python. The only pieces of hardware we will need for this tutorial are an RFD900+ radio modem and a USB to Serial Cord, both of which are shown below


Once we have the USB correctly plugged into the RFD900 we need to connect to it. To do this we need to find the name of the USB connection in the computer. First, you will need to open a terminal window. Once this is done type the command <ls /dev/tty.*> into the terminal window. This should list the available serial devices.
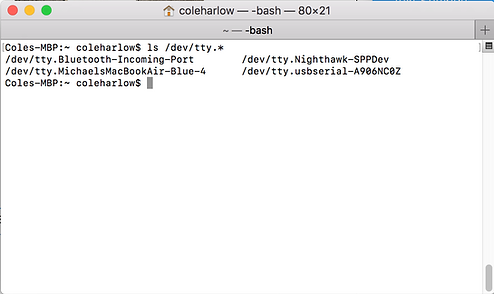
Note that within the Serial devices there will be one Serial device listed as a ".usbserial". In this case the full name is
"/dev/tty.usbserial-A906NC0Z"
Now that we have the name of the usb serial port we can use it in our Python code.
Dependencies
Now that all the hardware is set up we can begin downloading dependencies. The two dependencies we for this project are:
These dependencies can be downloaded using the following process
-
Go to the PIP page and download the package installer for Python. If you are using Python 3.4+ then pip should come installed automatically.
-
To install the dependencies open a terminal and type
-
(If using Python 2.x) pip install <package name>
-
(if using Python 3.x) pip3 install <package name>
-
Below is a terminal screenshot, showing the commands used to download pySerial. I believe that Time libary is actually natively installed in Python 3, so you will not need to install it using pip.

Code
The code written in Python can be found through the link below. The code is well commented and should be understandable even to those new to python. One extremely important note is that indentation is incredibly important in Python. This is because unlike other languages Python uses indentations to begin and end loop statements and if-else statements. If the indentations in a Python script are not correct the script will not run.
Below I have also included a flow diagram to help facilitate an understanding of the code
While Script is Running
Once we have the program running we can view the balloon in real-time using Google Earth. To do this we need to open up Google Earth Pro (after we have already started the Python Script). To show the balloon's flight we need to go to the top menu and select the "Add" pulldown menu. Within this menu select "Network Link". A pop-up menu will appear asking for the location of the network link. Select browse, to go through the files on your computer and select either currentLocation.kml or entirePath.kml. Finally, to make the path periodically update go to the "refresh" submenu in the pop-up menu. Change the text box next to "when" to "periodically". This tells Google Earth to periodically update the path. For detail see the video below.